Automated Azure-based Machine Learning compute node set up instructions
The main purpose of this part of the tutorial is to set up and attach a GPU-enabled compute instance to the Azure Machine Learning Studio.
After following this tutorial it should be possible to distribute workload on one or several of these compute nodes.
This is a demonstration that relies on Azure resources, creating Azure VM with GPU capabilities and preparing it for use
with Azure Machine Learning studio with a few simple steps. For detailed installation procedure on Azure VM or your own hardware,
follow the tutorial pages 3.2b, or 3.2c respectively.
The key components of this setup are:
- Ansible
- Kubernetes
- nVidia GPU drivers (enabling GPU intensive workloads)
- Azure CLI
Prerequisites
To successfully complete the installation, you also need to have access to the following information:
- Azure subscription eligible to activate instance of Azure Machine Learning Studio
- Azure login credentials, Azure subscription ID, Azure arc resource group name
- Preserve the provided SSH connection information to access the compute node during VM creation - IP address, username, access keys for the next steps in the tutorial.
The installation requires two types of devices:
- Service computer - Your standard workspace. Setup is done in the previous step.
- Compute node - virtual machine to which the deployment will be done. We will automatically create the virtual machine with the following parameters:
- Debian 11 "Bullseye" image or Ubuntu 22.04.
- The cheapest (although not cheap) VM with a compatible GPU is
Standard_NC6s_v3. - Authenticate by SSH key pair, stored at
~/.ssh/id_rsain the Service PC's WSL. - After setup, Port 22 of the virtual machine will be opened to the internet. We recommend further limiting the access in the network security group to only your IP address.
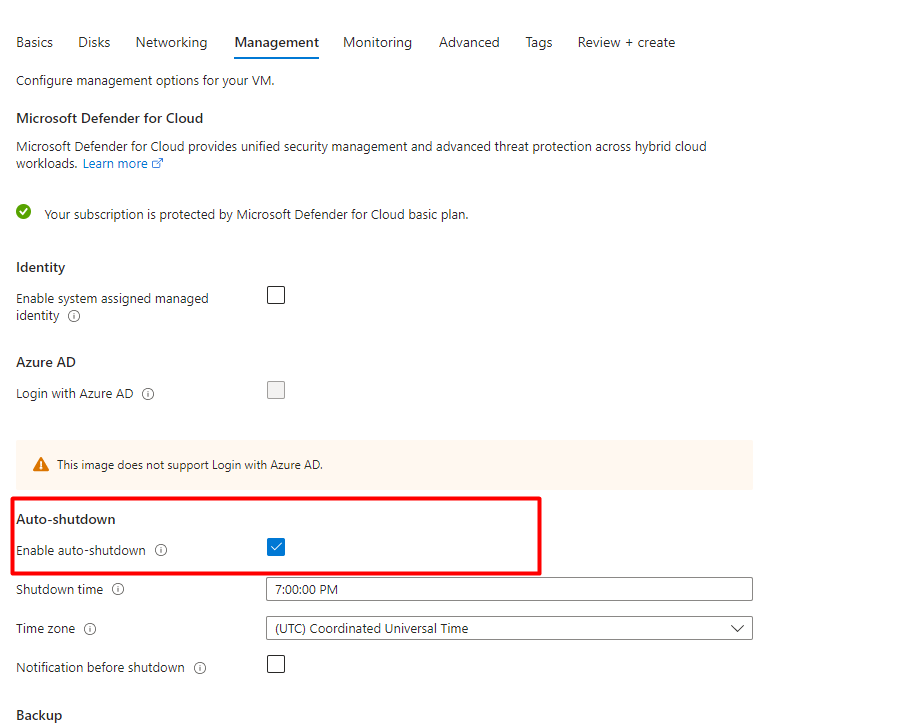
- Auto-shutdown feature is set up to prevent high costs during the testing, we recommend turning it off for performing long-running experiments. When Virtual machine gets turned off, you may turn it on from the Azure portal VM detail.
- Hard disk is set up to 128 GB, you can raise it in the "Disks" section of the VM details.
- Note that the machine parameters should be adjusted for different workloads. The configuration above is used only for demonstration purposes.
Procedure
Request access, download and extract the following ansible repository to your service PC. It contains scripts for automated deployment of the FL infrastructure. WSL has a seamless integration with Windows filesystem, you can copy and unzip the files either from the WSL console or directly through Windows explorer.

Change the Bash terminal window working directory to the
playbooksfolder:cd ~/cloud-native-stack/playbooksMake the
cloud-native-stack/playbooks/setup.shscript executable:chmod u+x setup.shAdd details of your Azure cloud resources to the
cloud-native-stack/playbooks/azure_values.yamlfile:subscription: Azure subscription IDresource_group: Resource group where Azure arc should be added. Has to be same as ML studio workplace resource group.location: Resource location (default:westeurope)microsoft_keyring: not to be changedimage_name:Debian11for Debian distribution orUbuntu2204for Ubuntu.
Log in to the Azure CLI on the Service PC. Make sure Azure CLI is installed either globally, or in the virtual environment together with ansible and the virtual environment is activated.
az loginDeploy the example compute node:
./setup.sh deploy-compute-nodeAfter the deployment is done, you find the virtual machine name and connection details in the
nv-playbooks-debian/hostsfile. You may also consult the Azure portal to observe the virtual machine properties. The name of the virtual machine has a form "compute-node-number".Now we get to the main part of the deployment. In this step, Nvidia cloud native stack (kubernetes, nvidia gpu drivers, etc.) and azure CLI are installed and configured. The step takes roughly 30 minutes to finish, based on the network and machine speed:
./setup.sh installAfter the script is finished, there should be no "failed" or "unreachable" tasks:
     user@local:~/cloud-native-stack/playbooks$ ./setup.sh install

     PLAY [all] *************************************************************************************************************************
     ... (lot of text omitted) ...
     PLAY RECAP *************************************************************************************************************************
     compute-node-12345                 : ok=17   changed=12   unreachable=0    failed=0    skipped=31   rescued=0    ignored=0
Validate the installation:
./setup.sh validateGo through the information provided and make sure values don't raise concerns.
Log in to the compute node and log in to the Azure CLI also there. You can find the compute node IP address in the
cloud-native-stack/playbooks/hostsfile, or in the Azure portal:> ssh azureuser@computenodeIP
> az login
< For login, open ... in the browser ...
> logoutYou should be able to see your subscription ID (named "id") in the response of the command after successful login. You may also observe the running kubernetes cluster by using command
kubectl, get information about GPU resources with commandnvidia-smi. Eventually log out from the compute node and continue with next steps again on the service PC.This step is going to connect your compute node into Azure hybrid cloud solution (Azure Arc) and prepare it for use with Azure Machine Learning Studio. It takes approximately 10 minutes:
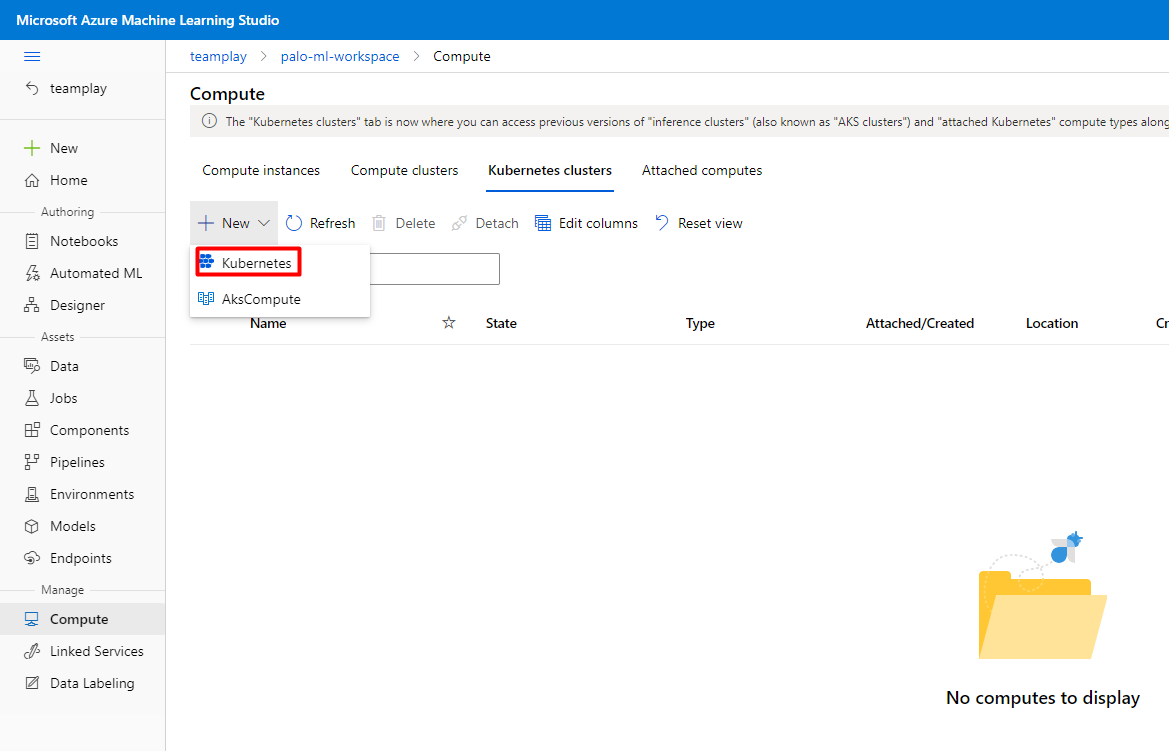
./setup.sh azure-extension-installationNow open Azure Machine Learning Studio in a browser on the service computer, attach your newly created cluster by selecting it from the dropdown in Workplace -> Manage -> Compute -> Kubernetes clusters -> New -> Kubernetes. Then pick up kubernetes cluster from the dropdown and attach our newly-created compute node.
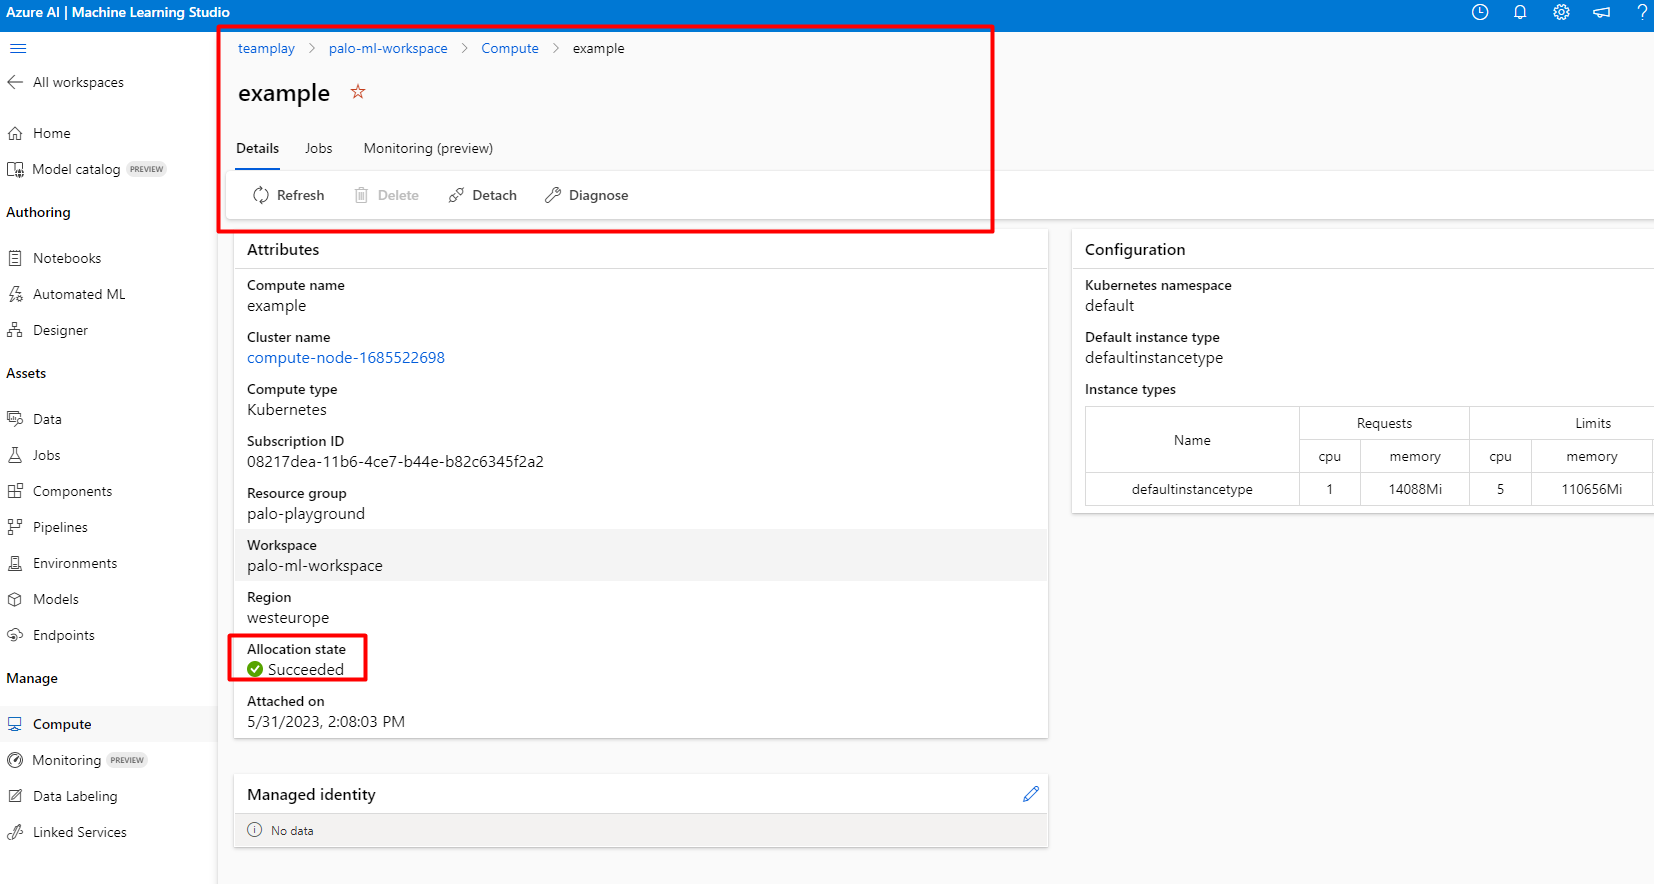
If everything worked, you should be able to see the compute node successfully connected in the Azure Machine Learning Studio.